
Gosh I love fall. Who doesn't? Fall gives us beautiful leaves changing colors, open windows, a touch of crisp in the morning air, football....I could go on and on. Fall also gives us perfect apples! Now that I'm thinking about it, apples perfectly reflect the characteristics of fall. They come in reds, golds and greens, they're crisp, and....and....well, that may be were the similarities end. But, when I think of fall, I think of apples, that's for sure. Apples and pumpkins. However, that's for another day!
I've had a hankering for some caramel apples for a very long time, and was waiting until the fall to make them. I knew that the apple festival was coming around that my family goes to every year, so I planed to stock up! And stock up, I did! Thankfully, my husband just handed me his wallet and walked off to keep up with our ever wandering daughter. He
We had an amazing family outing in the mountains, looking at the beautiful leaves, picking out the perfect apples, and making lots of family memories!
I could barely contain my excitement to get started with making these fancy apples. I know, I know, I could have just bought one, but have you seen how much they charge for apples like these?! I know I'm cheap, but I'm not about to drop $30+ for an apple. I don't care how "gourmet" they are.
So, as always, I decided to just make my own! I think they turned out pretty gourmet looking, don't you??
Here is our grocery list for today's adventure:
1 bag of soft caramel candies
2 TBS water
1 bag of milk chocolate waffers (I use Wilton's candy melts)
1 bag of white chocolate waffers
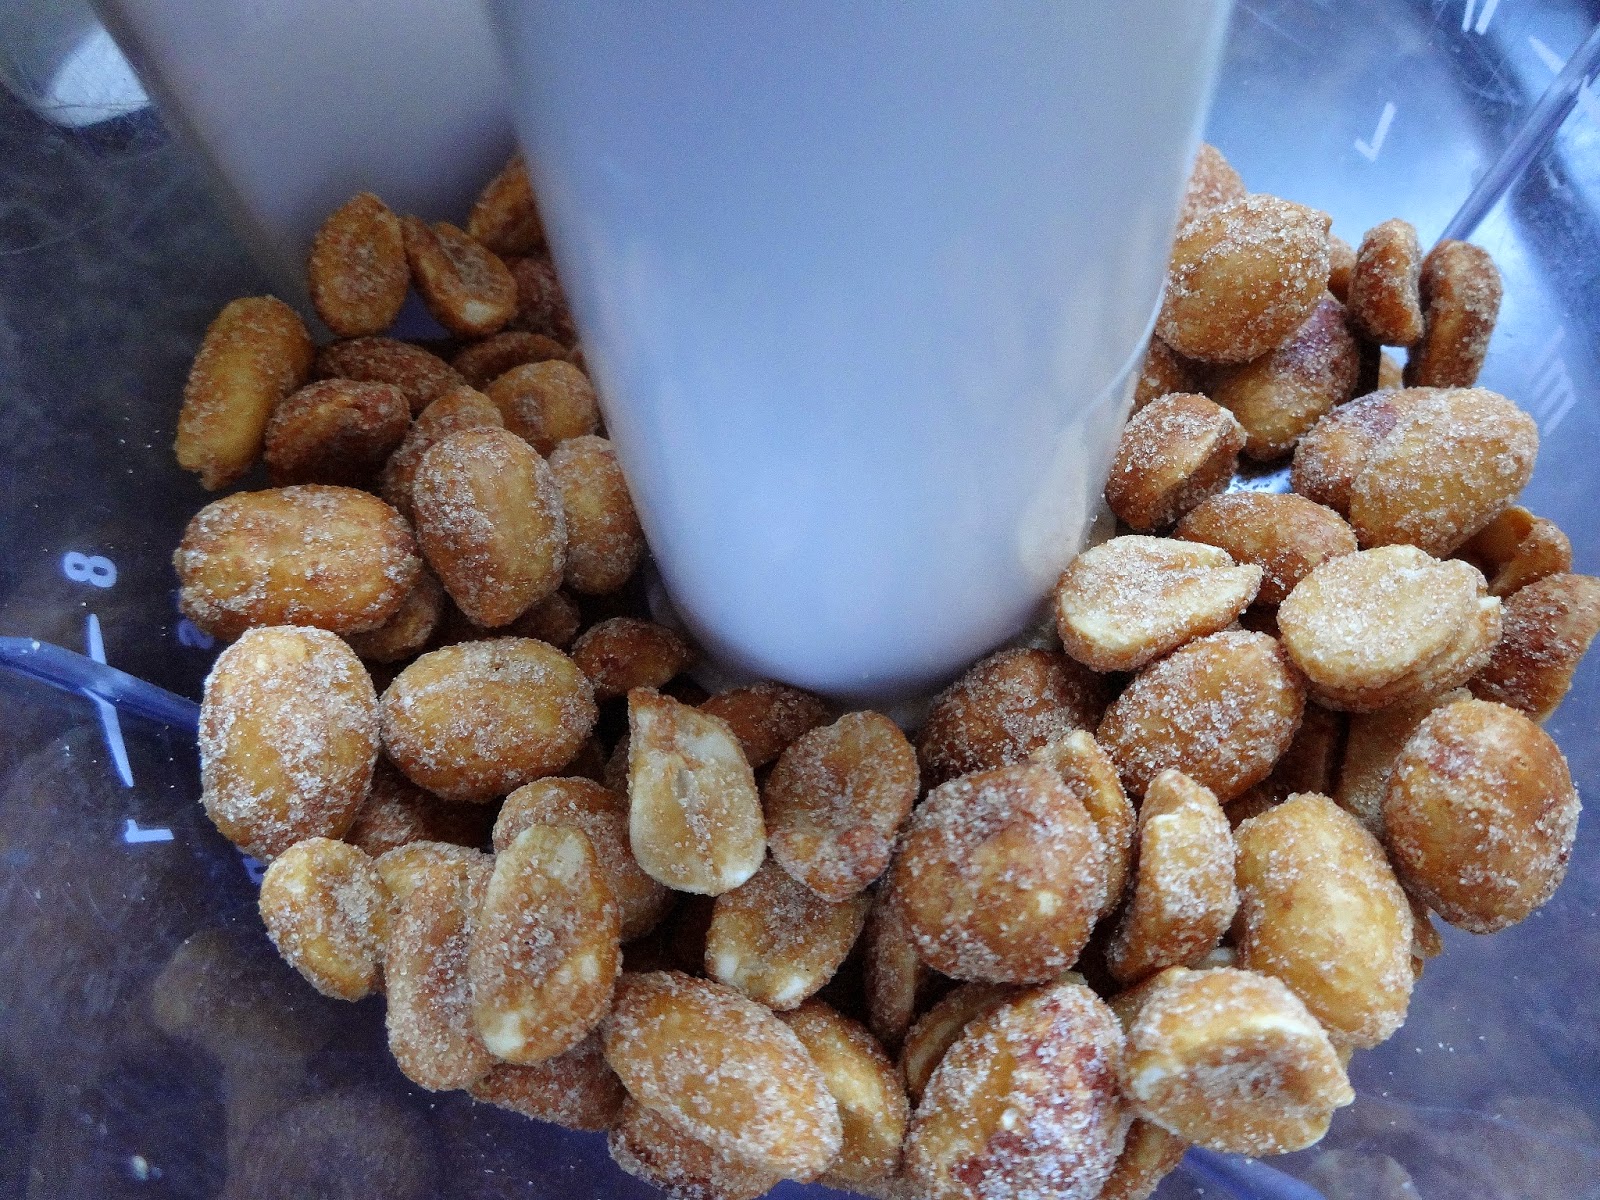
Toppings of your choice (I kept it simple with honey roasted peanuts, but
you can use whatever you'd like. Coconut flakes, mini chocolate chips, crushed up Oreos...)
Apples, of course
Skewers
These seriously couldn't be easier to make. I only made a few, because my husband doesn't eat them, and I don't need several staring at me! So, I figured I would make 3 and snack on them until they were all gone! To start with, unwrap all of your caramel candies, and put them in a small heavy-bottomed pot, with the 2 TBS of water. Set the pot on your stove, over medium-low heat, until the caramel has melted completely; this should take about 5 minutes or so.
While your caramel is melting, wash your apples (if you buy your apples from the store, they will have a wax coating. In my canned homemade tomato sauce post, I talk about how to remove that wax coating...if you don't remove it, your caramel will slide off of your apples!), stick the skewers in (I got mine from Wal-Mart, in the craft section), and make sure they are dry. Very dry. If there is any moisture, the caramel won't stick to your apple. I just scrubbed my apples, and dried them with a towel.


When your candies have melted, slowly dip your apples in, and twirl them around, until fully coated. When your apples are coated, let the excess caramel drain off; otherwise it will puddle up on your parchment paper. Not the end of the world, but it will be a sticky mess later.


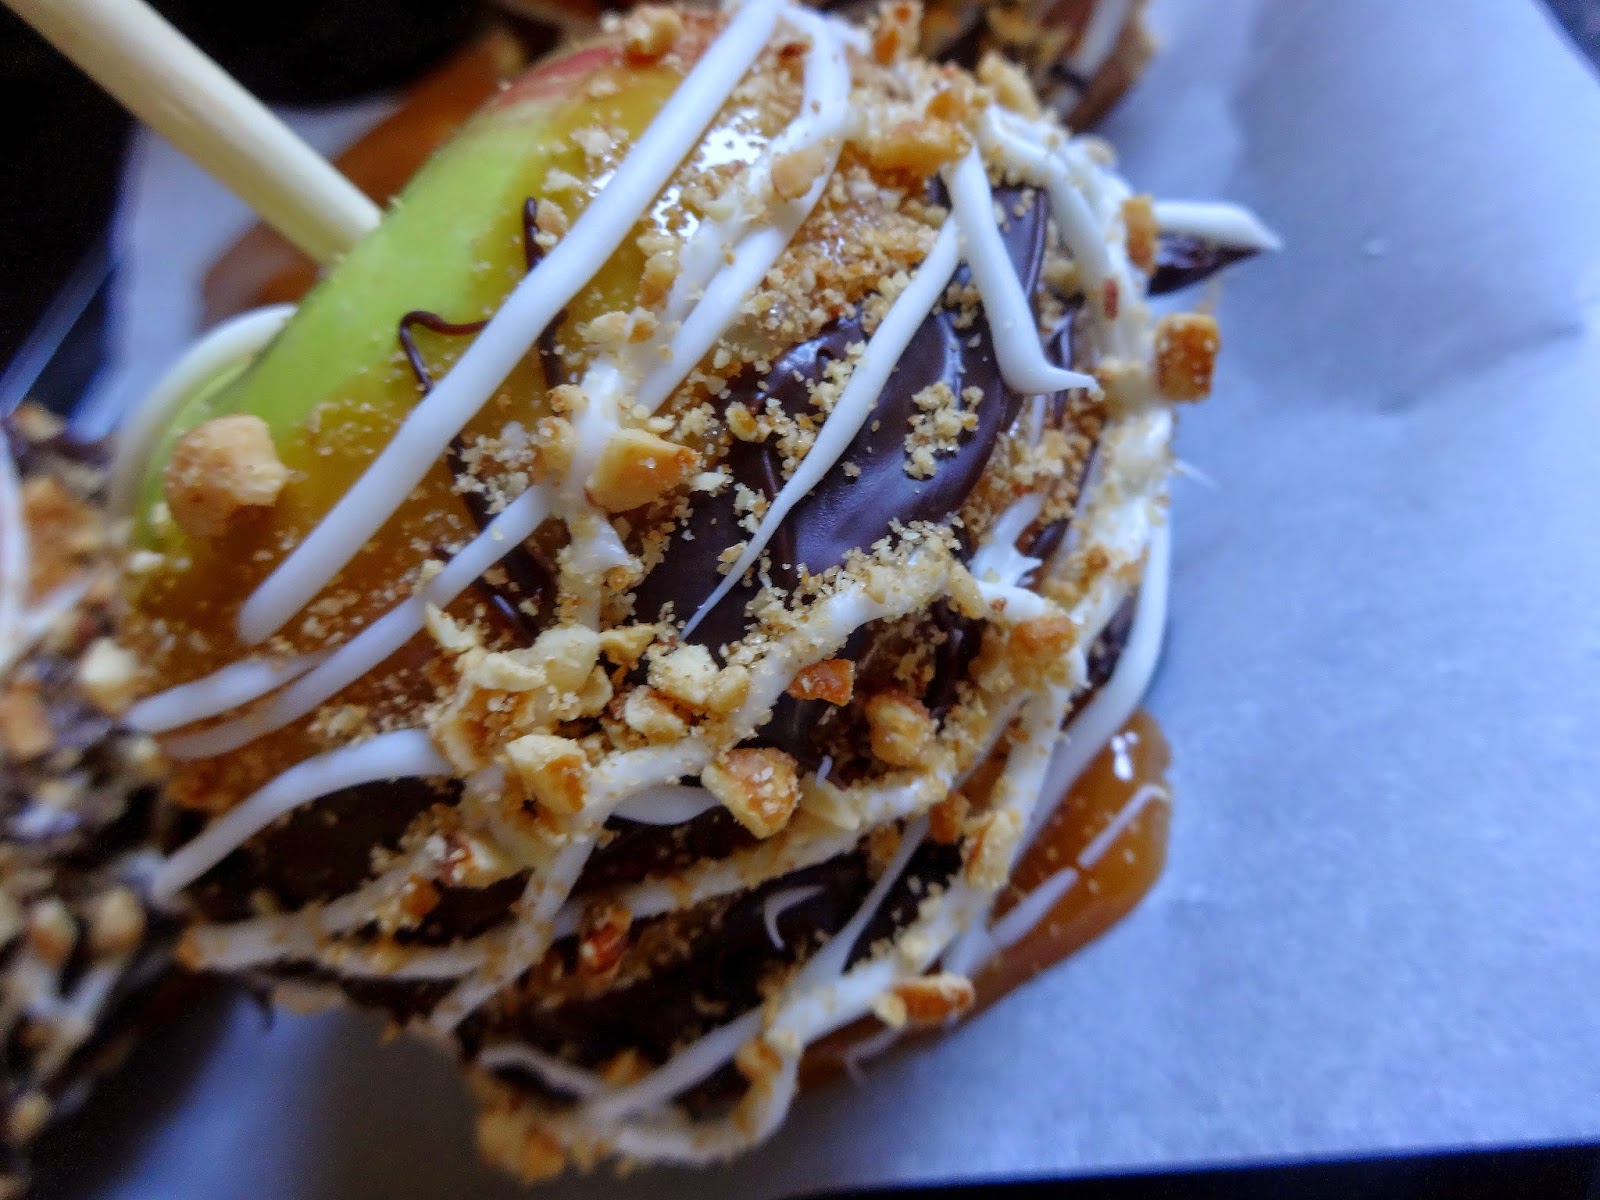
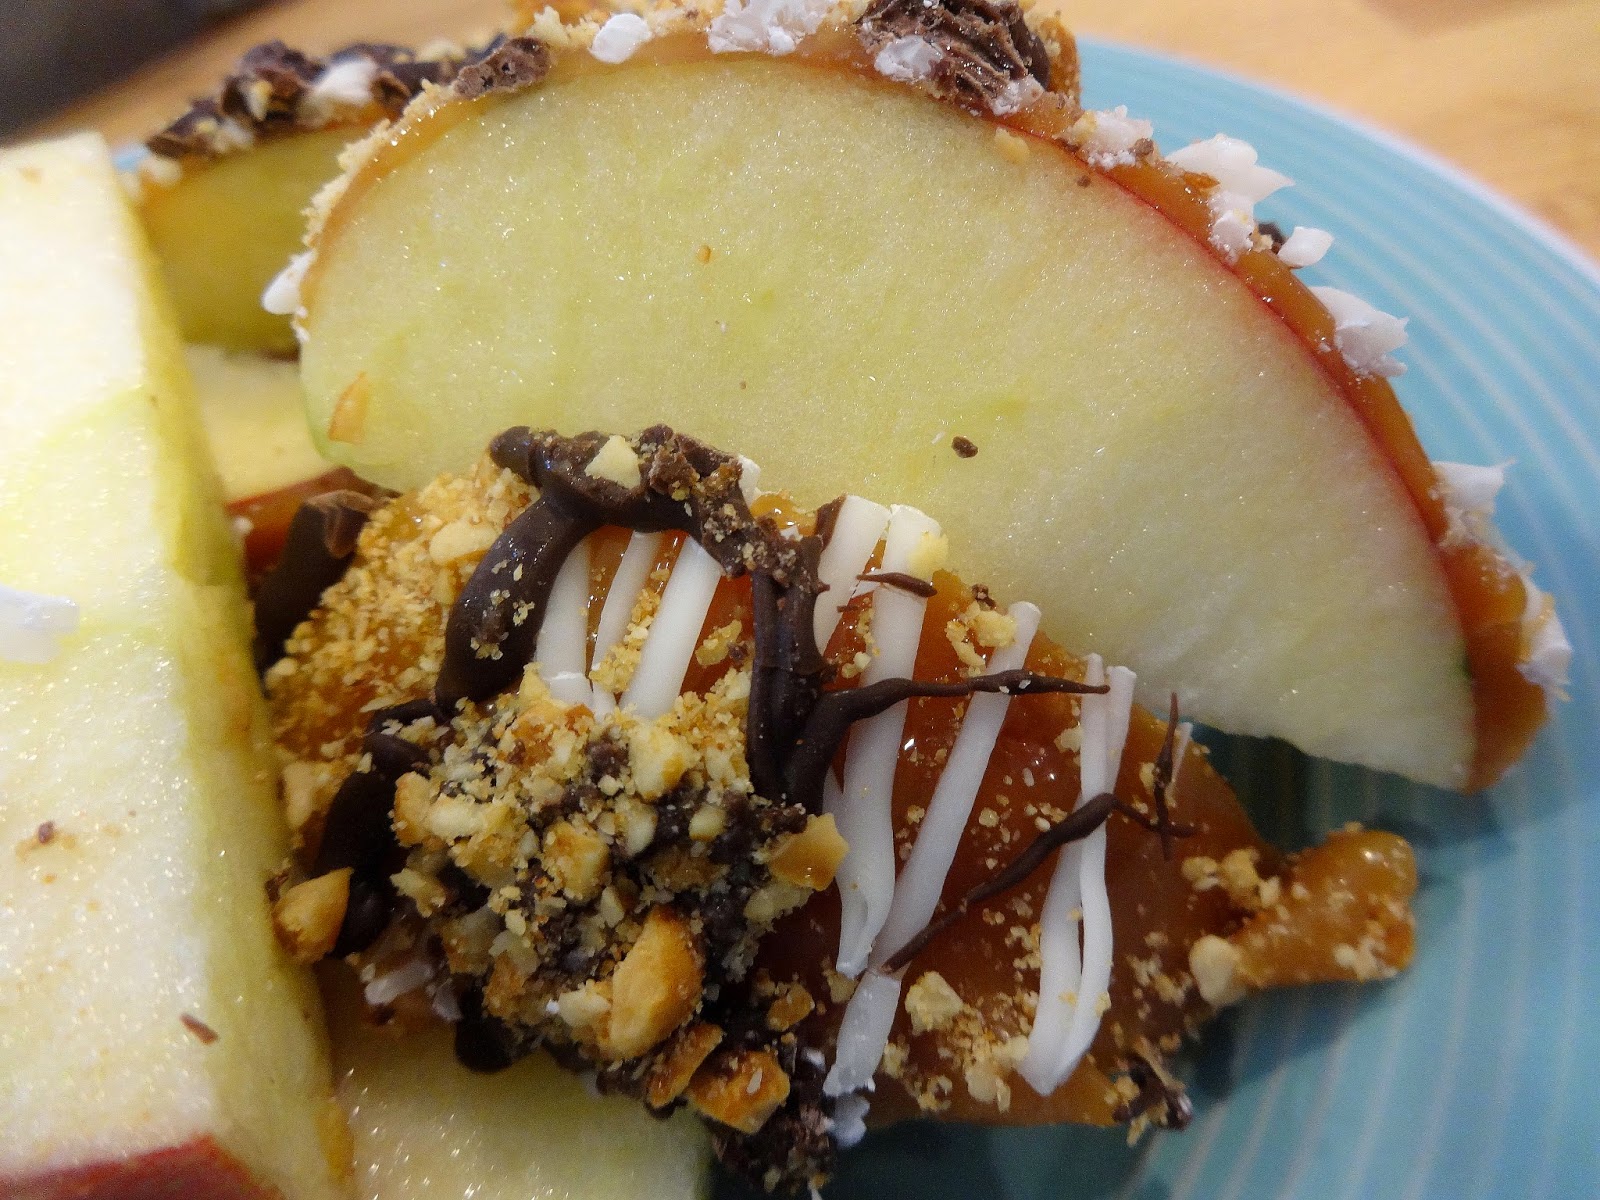
You can see that I didn't let the back apple drain off all of the way. I let it finish settling, then picked it up, and smoothed the caramel off with my finger. No big deal. Let these apples sit in the fridge, for at least an hour, for the caramel to fully set up. You can leave these at this point, and they would be great. However, I wanted to go a step (or two!) further. I took my chocolate waffers, put them into their own zip top bags, and into a microwave safe glass. I find it easier to melt the chocolate this way, personally, but feel free to do it however you'd like. If you want to do it this way, this is how I did it: I used the "defrost" setting on my microwave, 1 minute at a time, until they were fully melted. This took about 5 minutes, which I was really surprised about, since we think our microwave is nuclear powered (seriously, don't microwave anything in our microwave for longer than 3 minutes, unless you want it to set fire. Clearly, I don't use the "defrost" setting often.)


While your chocolates are melting, get together whatever other toppings you're going to use. I ground my peanuts up in a little food processor for a couple of seconds, to give myself a peanut powder.

Once your chocolates are melted, just snip a small amount of the corner off of the bag. This will allow for a very thin drizzle to come out, and give the apple a "fancy" look. Pick up an apple, and drizzle your chocolates over it, while slowing turning the skewer.


No comments:
Post a Comment