
I know, I know, Thanksgiving is in 2 days, what am I doing posting a chicken enchilada recipe?? Well, I figured with turkeys, and all of the fixings would be every where over the next few days (not to mention the weeks leading up to Thanksgiving), I'd do something a little different.
I never ate enchiladas growing up, mainly because they have onions mixed into the meat, and as we're aware, I don't like onions. But one day, I wanted to try something different than our usual "Taco Tuesday", so I made up some enchiladas! ...and I have never looked back.
I never ate enchiladas growing up, mainly because they have onions mixed into the meat, and as we're aware, I don't like onions. But one day, I wanted to try something different than our usual "Taco Tuesday", so I made up some enchiladas! ...and I have never looked back.
These are so easy to make, even with the homemade tortillas (which, by the way, are out of this world!), come together pretty quickly, and can be prepped and stuck in the fridge for a very easy weeknight supper.
Who doesn't love cheesy, saucy goodness? I make giant enchiladas, but you could easily roll your tortillas out to whatever size you'd like, or buy whatever size you want at the store.

Here's your grocery list for this one:
For the enchilada meat sauce:
3-4 Boneless/skinless chicken breasts (plus herbs and spices for roasting)
Drizzle of olive oil
1 C shredded Cheddar cheese, plus another 3/4 C for topping
1 Tbs dried parsley
1/2 tsp dried oregano
For the enchilada meat sauce:
3-4 Boneless/skinless chicken breasts (plus herbs and spices for roasting)
Drizzle of olive oil
1 C shredded Cheddar cheese, plus another 3/4 C for topping
1 Tbs dried parsley
1/2 tsp dried oregano
1 tsp garlic powder
1/2 tsp Kosher salt
2 C tomato sauce*
1/2 C water
1 Tbs chili powder
2 C tomato sauce*
1/2 C water
1 Tbs chili powder
For the topping sauce:
1/4 C vegetable oil
2 Tbs self-rising flour
1/4 C chili powder
1 C tomato sauce*
1 1/2 C water
1/4 tsp ground cumin
1/4 tsp garlic powder
Salt to taste
For the homemade tortillas:
4 C All purpose flour
2 tsp Kosher salt
2 tsp baking powder
2 Tbs self-rising flour
1/4 C chili powder
1 C tomato sauce*
1 1/2 C water
1/4 tsp ground cumin
1/4 tsp garlic powder
Salt to taste
For the homemade tortillas:
4 C All purpose flour
2 tsp Kosher salt
2 tsp baking powder
4 Tbs Lard (I use Crisco)
1 1/2 C warm water
* I just buy one 32 oz can of tomato sauce, and divide it up between the two recipes. If you don't want to buy one large can, just buy one 15 oz can of tomato sauce (for the meat sauce; you'll be one ounce shy of 2 cups, but that's fine), and one 8 oz. can (for the topping sauce).
The steps for this supper are a lot like my cheesy chicken quesadillas, and it sounds like a lot of steps/ingredients, but its really not that bad, I promise!
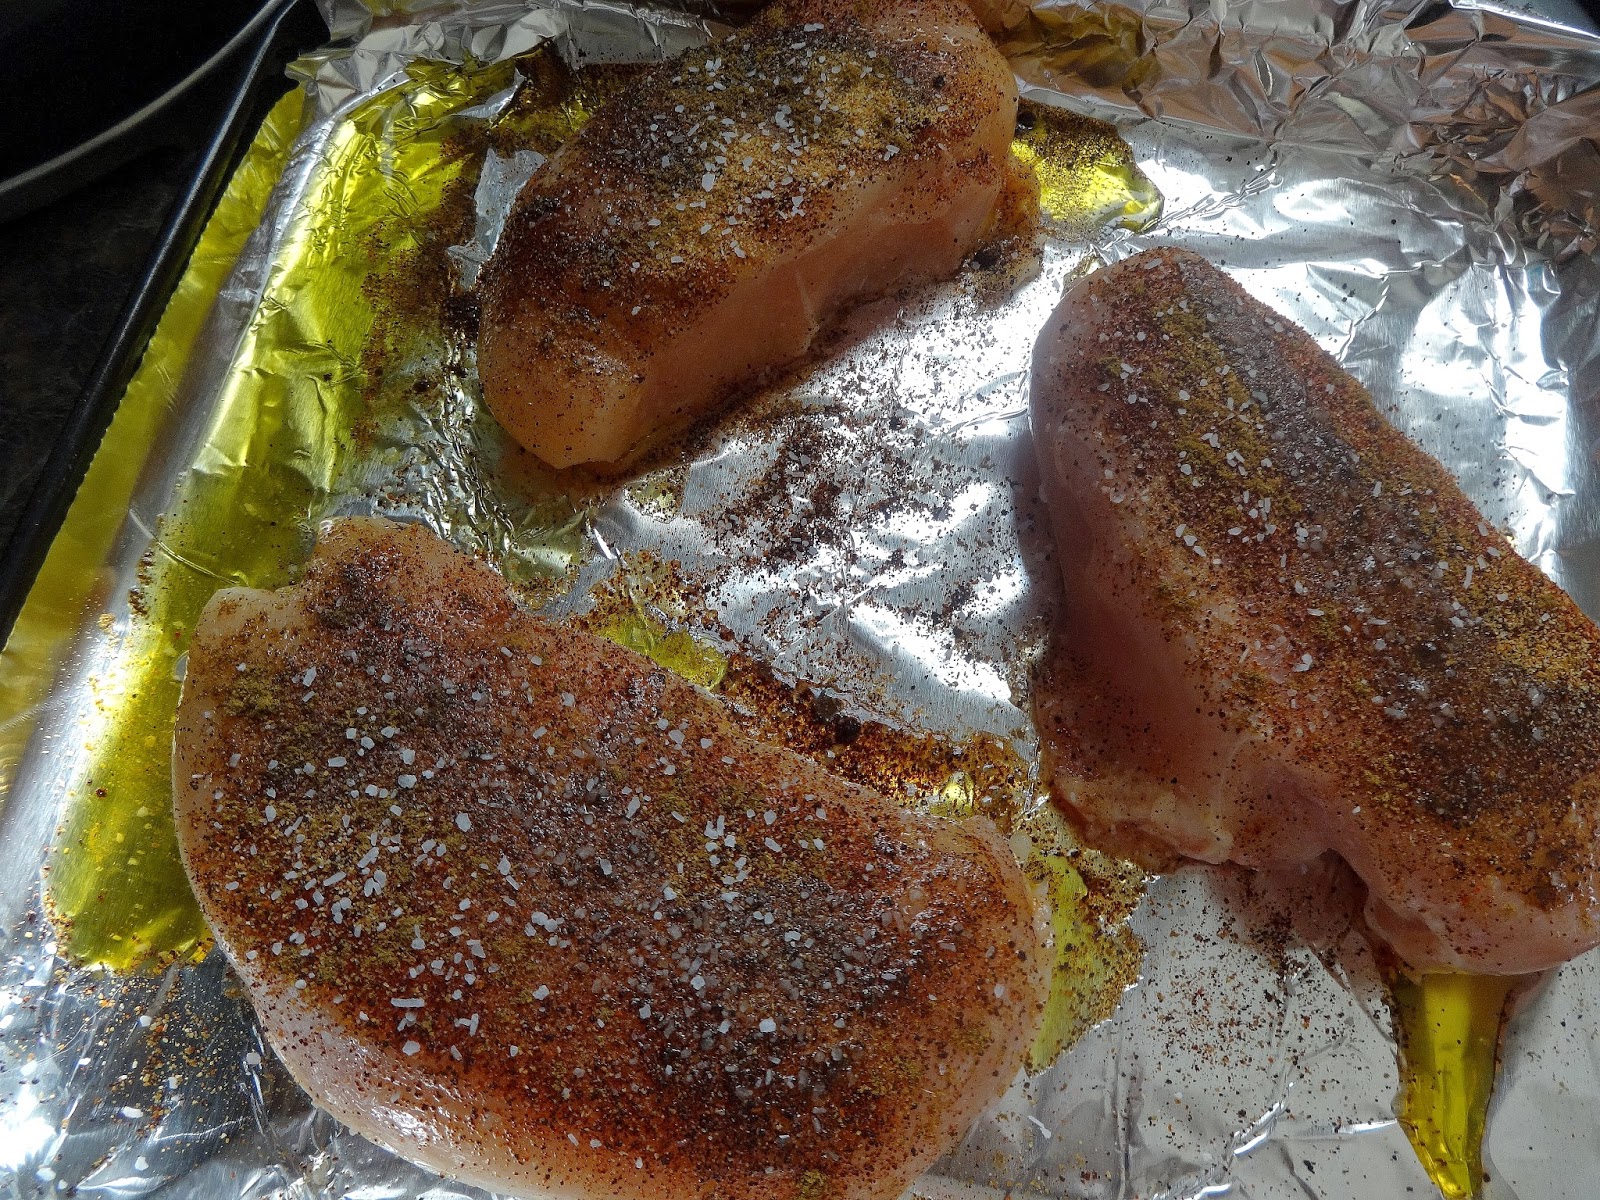
To start off with, preheat your oven to 400*, and wrap a baking sheet with aluminum foil (gotta love easy cleanup!). I normally trim any fat and tendons off of my chicken breasts, but if I'm going to shred them up after they've cooked, I don't worry with it. I top my chicken off with a little bit of olive oil, salt, dried oregano, garlic powder, and chili powder! I like to have everything seasoned, every step of the way! Once your oven has preheated, slide the chicken in to cook, for about 20-30 minutes, or until the center is no longer pink.
I like to cook my chicken in the morning, or mid-morning, so it is nice and cool when I'm ready to shred it later.
The steps for this supper are a lot like my cheesy chicken quesadillas, and it sounds like a lot of steps/ingredients, but its really not that bad, I promise!
To start off with, preheat your oven to 400*, and wrap a baking sheet with aluminum foil (gotta love easy cleanup!). I normally trim any fat and tendons off of my chicken breasts, but if I'm going to shred them up after they've cooked, I don't worry with it. I top my chicken off with a little bit of olive oil, salt, dried oregano, garlic powder, and chili powder! I like to have everything seasoned, every step of the way! Once your oven has preheated, slide the chicken in to cook, for about 20-30 minutes, or until the center is no longer pink.
I like to cook my chicken in the morning, or mid-morning, so it is nice and cool when I'm ready to shred it later.

While my chicken is cooking, I like to start working on my tortilla dough. These are so fun to make! To start off with, in a medium mixing bowl, add in your flour, salt, and baking powder, giving everything a quick whisk, to make sure it is all well mixed. Then add in your lard, mixing with your finger tips (if you squish it in your hands, the heat from your hands will cause the lard to melt).


You want the lard to be about pea-sized by the time you're ready to add in the water. I had to wear a glove, because I'd cut my finger earlier in the day, and I didn't want to get flour/lard/water all over my bandage! You'll know you're ready to add the water, when you squeeze the flour and it holds its shape.


Slowly add in you water, about 1/2 C at a time, mixing well with each addition, until a dough forms. It may be a little crumbly after all of your water is added, but that's okay.

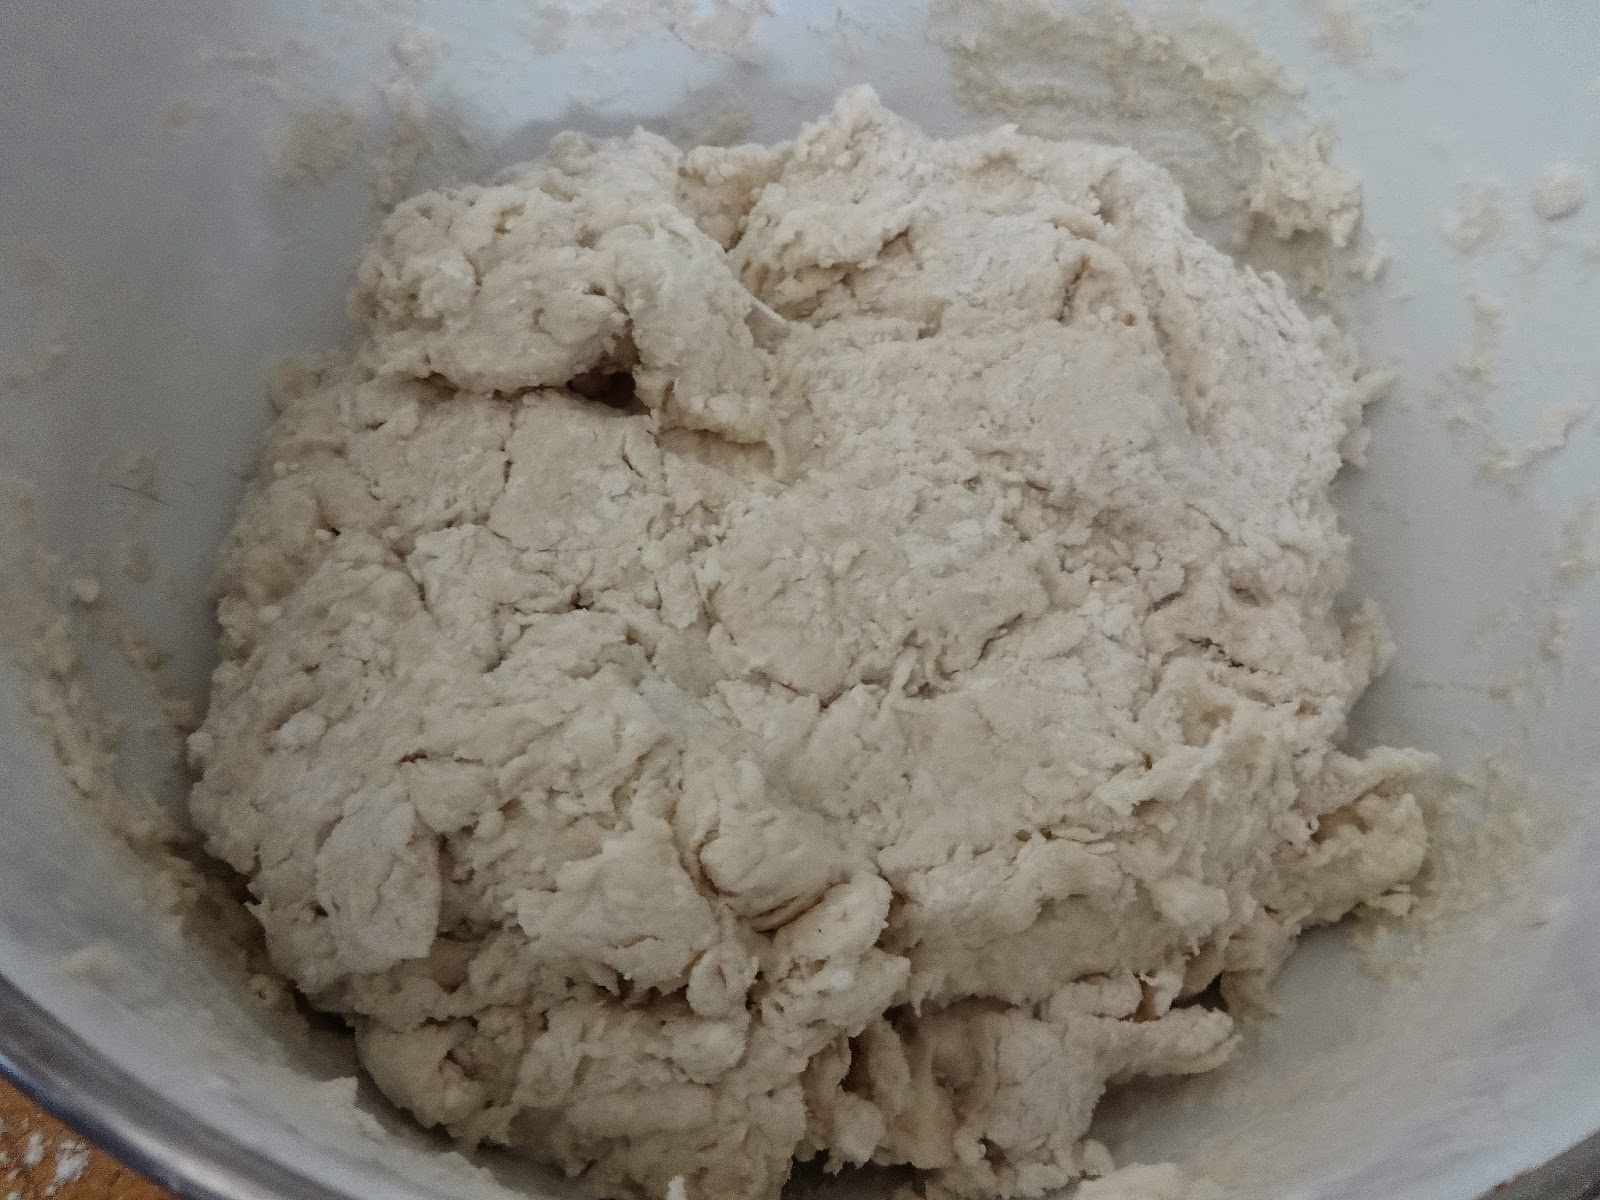
Turn the whole mess out onto a floured counter top, and knead until a smooth, elastic dough forms, about 5 minutes or so.


Since I like large tortillas (10-11 inches or so), I cut my dough up into 8 equal pieces; if you want smaller ones, cut them up into 16 pieces. Put these back into your mixing bowl (its fine if they touch, or if you have to stack them on top of one another, they will pull apart easily enough later), and let the dough rest for at least 20 minutes, covered with a damp kitchen towel. I usually let mine rest for a couple of hours, while I go on with the rest of my day. In my fluffy yeast roll post, I show how to easily divide the dough up into even pieces.


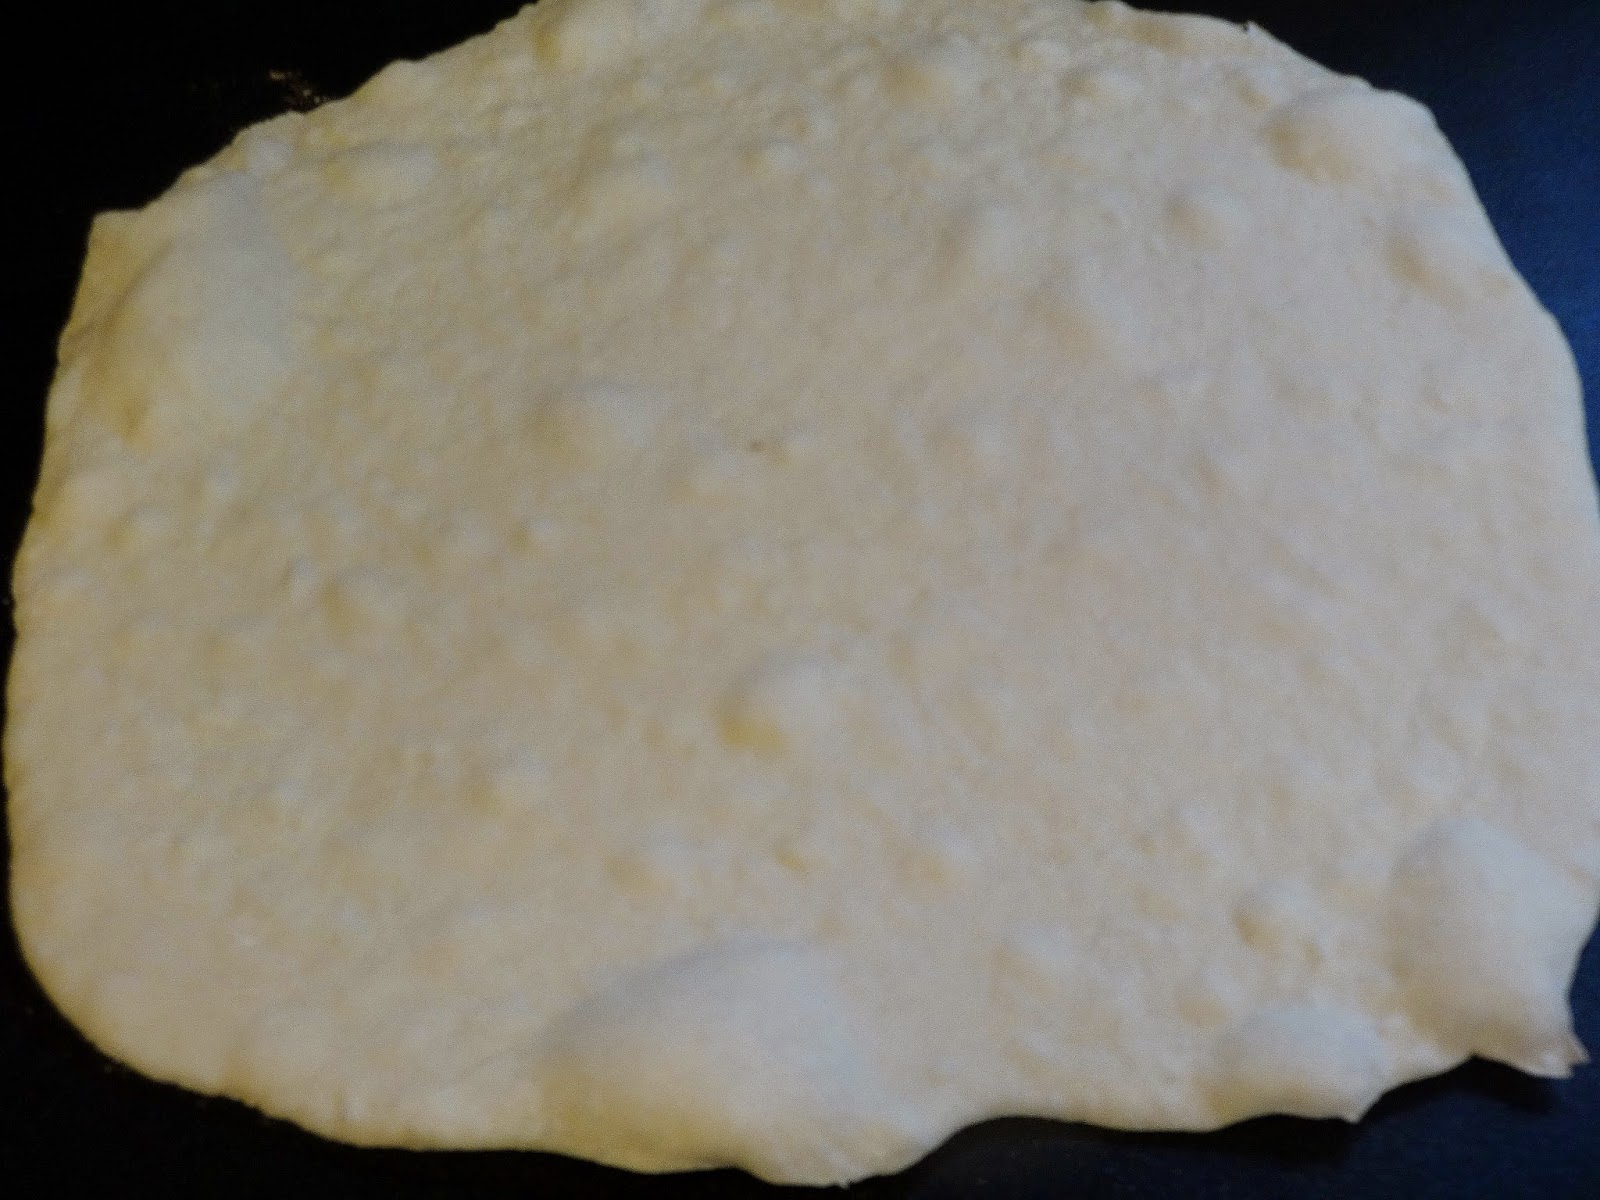
When you're ready to roll your tortillas out, lightly flour your working surface, and roll your dough out, one at a time. I like to take my rolling pin, and roll it forwards and back toward me one time, rotate my tortilla roughly 45*, then roll it again, forwards and backwards, then turn it again. Keep doing this until you have the size tortilla you want. This helps to keep the shape mostly circular (although they're not always perfect...they are homemade, after all!), and by doing this, you can make sure your tortilla doesn't stick to your work surface.


When my tortilla is ready, move it to a skillet, or electric griddle, preheated to a medium high heat. Once you lay your tortilla down, you'll notice it starts to bubble pretty quickly. This is normal, and, actually, its what you want. These bubbles become the delicious brown spots on your tortilla. They will deflate on their own, but if you're worried about it, you can press down on the tortilla as it cooks. No worries!


After a minute or so, flip your tortilla over, and let the other side cook the same way. After both sides have cooked, transfer your tortilla to a plate, and cover with a damp towel. Stack them, one on top of the other, always keeping them covered with the damp towel (the moisture from the towel helps to keep them soft). I like to have one rolled out while one is cooking, I transfer the cooked one to the plate, move the rolled out one to the griddle, then roll out another one. Its a bit of a process, but these soft fluffy tortilla shells are totally worth it. Even better, if you make the monster ones like I do, you will absolutely have leftovers, and these freeze beautifully. I wait for mine to cool completely, then pop them in a gallon sized freezer bag, and pop them straight into the freezer. Next time "taco Tuesday" rolls around, they're all ready to go!
Now then, the chicken has cooled, and is ready to shred up.


Shred all of your chicken up, and put it into a large skillet. Cover with the cheese, and heat over medium high heat, until the cheese has melted.


It will look like a total mess, but that's fine, it will all work out, I promise. Once your cheese has melted, add in all of your spices, and salt.


Add in your tomato sauce and water, then mix well. Your chicken mixture is ready! How easy was that??


Okay, we're almost finished! Now, in a smaller skillet, heat your vegetable oil over medium high heat again, and add in your 2 Tbs of self rising flour. This is what is going to thicken your sauce, so you'll want this to cook, stirring constantly, until it is the color of a light brown, about 5 minutes.


Carefully mix in your spices, tomato sauce, and water. Don't forget that this is very hot oil that you're adding liquid to, so do be very aware of what you're doing while you're adding this in. I've never had a problem with it, just be aware of what's going on while you're adding it in.


Let this thicken together, for about another 5 minutes, stirring frequently, to make sure that the bottom doesn't burn. At this point, you should be ready to assemble your enchiladas, so preheat your oven to 350*, so it will be ready for you in a few minutes.
Now for the very easy part, take a tortilla shell, and add in about 1 C of the chicken mixture, fold up the bottom of the tortilla, then wrap the sides around the middle, and lay the new bundle in a 9"x13" heavy bottom pan.


Don't forget, whatever leftover shells you have, just pop into a freezer bag, and place them in the freezer for later use! Yum!


Once you have your pan filled up (yes, I know...I make gigantic enchiladas...we can only eat one and a half, if we're starving!), pour your sauce over the top and sprinkle with the 3/4 C of cheese (if you add a little extra, I won't tell anyone....I promise!)


Bake, uncovered, for 20 minutes, then pull them out, and let them rest for about 10 minutes. They will still be screaming hot, so don't worry about them cooling too much during the resting time!


These are amazing! It is a little involved, but it is so worth it! The first time I made tortillas at home, my husband and I ate the entire batch, and we weren't even embarrassed. These also make for really good left-over lunches the next day (and the day after!)!


No comments:
Post a Comment