
Happy Tuesday (and St.Patrick's Day), everyone! As you probably don't know, tomorrow is my birthday, so, instead of doing a traditional green something or other for St.Patrick's Day, I figured I would do up a birthday cake of sorts, for myself.
I would love to do a standard birthday cake, but my husband isn't a big cake person, and I don't need a whole cake staring at myself all day! That just wouldn't do!
I would love to do a standard birthday cake, but my husband isn't a big cake person, and I don't need a whole cake staring at myself all day! That just wouldn't do!
So, instead, I'll just make a different kind of cake...a cheesecake! That sounds good, but it has a similar problem. I don't need, or want, a whole cheesecake staring me in the face, daring me to eat the entire thing*.
And I am nothing, if not a problem solver! I'll just cook them up in a muffin tin, and make individual cheesecakes! And, while I'm at it, top it off with some cherry pie filling! Problem solved!

Good gracious, don't you just want to dive into this thing, head first?! I know I do, and I have a couple of them sitting in the fridge!
Here's your grocery list for this one:
For the crust:**
6 Tbs of unsalted butter, melted
8 graham crackers, pulverized
2 Tbs granulated sugar
For the cheesecakes:
2 packages cream cheese, softened
2 eggs
3/4 C granulated sugar
1 tsp. vanilla
Topping, if using:
Pie filling, of choice
In all honesty, these could not be easier to put together, which is good, because they are amazing, and will be something you reach for often when you want a dessert that will impress your friends! To start off with, melt the butter in a microwave safe bowl, or in a small pot on the stove, and set it aside for a moment.
**If you don't want to make up the graham cracker crust, you certainly don't have to! I've made these before with just a vanilla wafer on the bottom, and they are still simply divine!


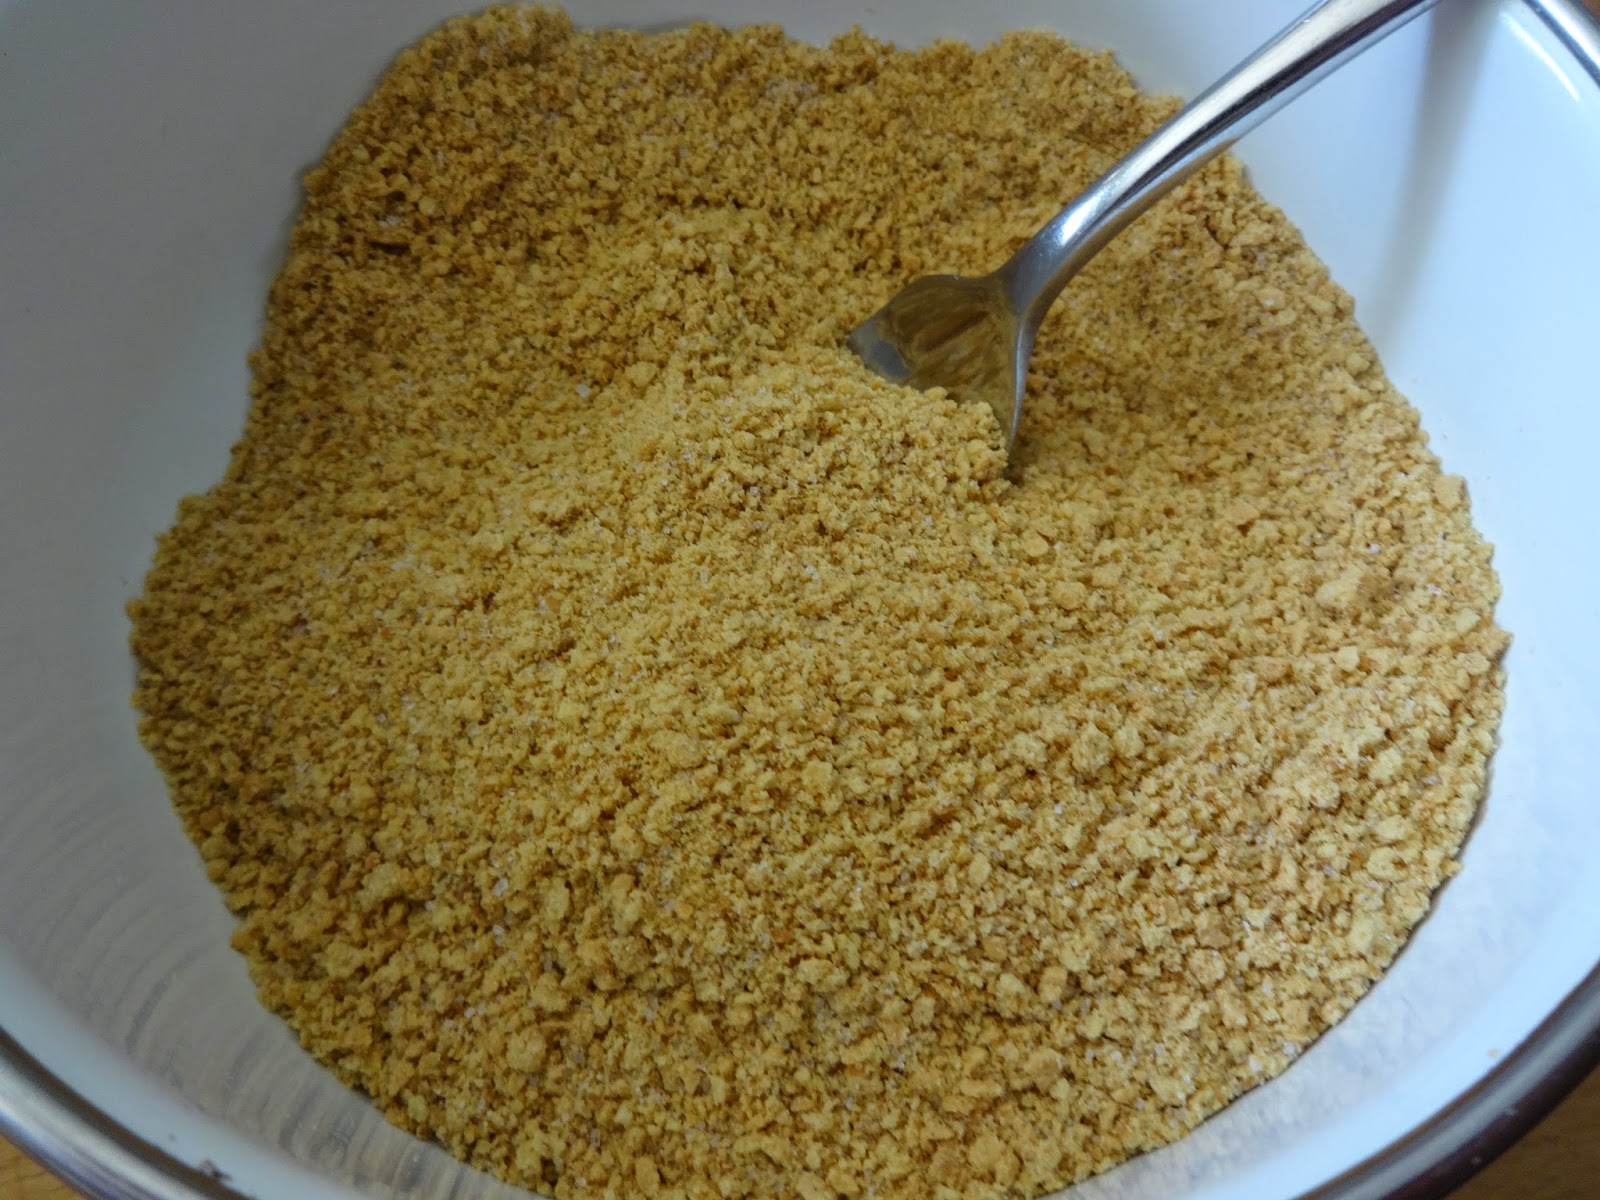
Put your graham crackers in a food processor (I did mine in two batches, since I didn't feel like bringing out my large food processor), and pulverize them until they are fine crumbs. Did you know that you can actually buy graham cracker crumbs now? I found them at the store the other day, and my first thought was, "Oh! Great! Now I can save a step!"
However, I still bought the solid crackers, because I know my husband and daughter love the regular ones so much, so, I just put them in a food processor and whirl 'em up.
Once all of your graham cracker crumbs are together, mix in the sugar with a fork, and then mix in your melted butter, until you have something that resembles wet sand. If you really want to jazz it up a bit, toss in a tsp. of cinnamon, if you want! I've done this before, and it's lovely!


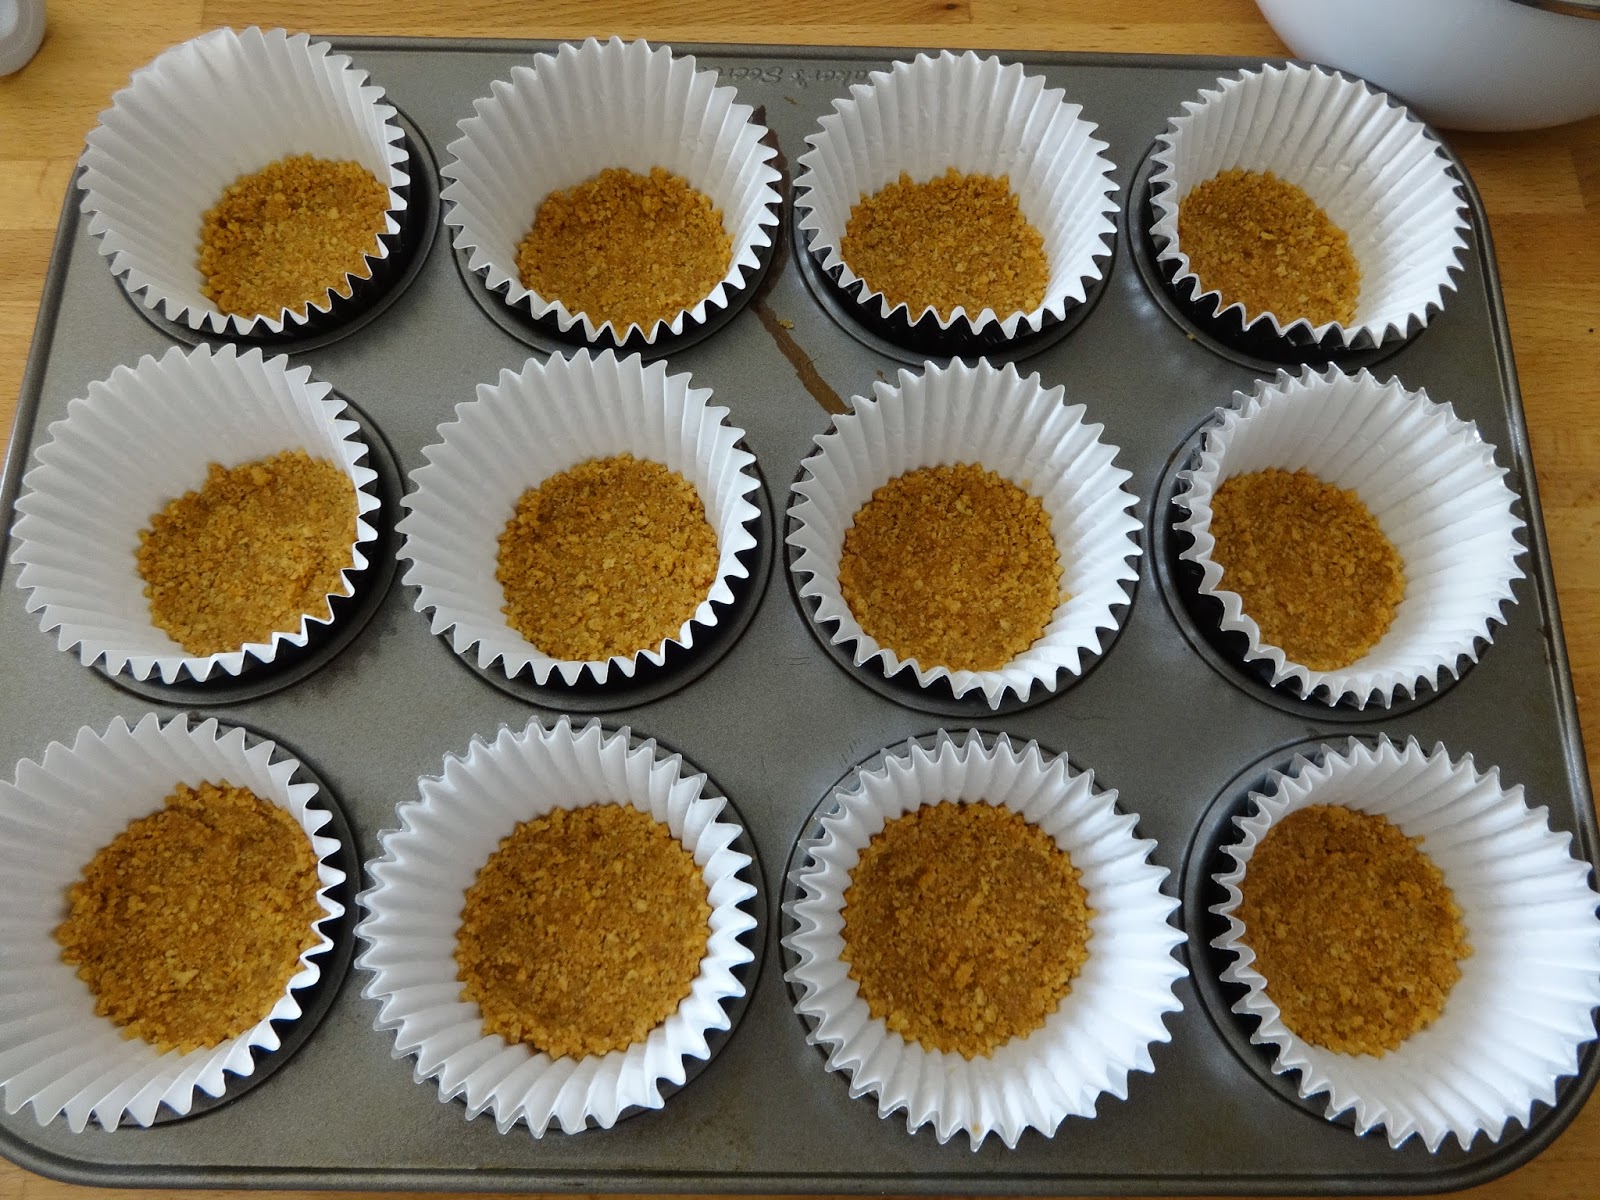
Once you have that together, line your muffin tin with cupcake liners, and press about 1 Tbs of crust mix into the bottom of the liner, and up the side a bit, if you can. I had a good amount of crust mixture leftover, but you'll see later, I only had enough cheesecake mixture to make up 9 cheesecakes. I didn't mind, I baked off all 12 of the crusts anyway, and crumbled some of the extra crusts over the tops of the other cheesecakes.


So far, so easy, right? Well, the cheesecake batter isn't much more difficult than the crust is! So, to get started with preheat your oven to 350*, put your softened cream cheeses into a mixing bowl, and mix on medium speed, until it looks smooth and creamy. This should take just a minute or so.


Next, add in your two eggs and vanilla. I used a clear vanilla, since it's what I had on hand, so you may not be able to see it in the picture, but it's in there! I promise! Mix your eggs, and vanilla in, until it has just come together; another minute or so.


With the mixer running on low, mix in your granulated sugar, then turn off your mixer all together. There will still be some lumps and bumps in this mixture, and that's just fine. There is also something else I should note here; if you want to really personalize this here, you absolutely can! Feel free to add in some lemon zest, some lime zest, or even some orange zest! Let your imagination run wild! I went with a basic version of this recipe today, just to get the base recipe out, but feel free to experiment the more comfortable you get with this!


As I usually do, I put this batter into a zip top bag, and poured the cheesecake batter into each up, about 3/4 full, and popped them into the oven for 20 minutes.


These don't look too pretty going into the oven, but that's okay, they'll puff up beautifully in the oven. After 20 minutes, when you pull them out, you'll notice that they are a little bit jiggly in the center, which is how they are supposed to be. As they cool, they will deflate, and sink in the middle, leaving a perfect cup for your topping of choice!


*Yes, yes, you can easily bake a whole cheesecake, cut it up into slices, and freeze the slices individually, but, common, aren't these adorable? Besides, it's my birthday, and I can have my cheesecake however I'd like! See you Thursday!


No comments:
Post a Comment