Good morning, everyone! Happy Thursday! Today we're going to go over how to make homemade tortellini!
As I have stated before, I love making pasta at home, people seem so impressed, even though it really isn't that difficult, or expensive to do! What's better than that?
To make the tortellini, I just used the dough from my fresh pasta recipe, and rolled it out into sheets of lovely pasta, then cut out circles, and filled with with a delicious roasted garlic ricotta cheese filling!
I cooked these tortellini in a tomato cream sauce, so that the pasta absorbed the flavors of the sauce, and helped thicken it just a bit!
This dish really is a winner, and I hope that you try it soon in your kitchen!
This dish really is a winner, and I hope that you try it soon in your kitchen!
Here's your grocery list for this one:
1 head of garlic, roasted (plus olive oil, and Kosher salt)
1 head of garlic, roasted (plus olive oil, and Kosher salt)
32 oz. ricotta cheese
4 Tbs dried parsley
3 cloves of garlic, minced
1 Tbs olive oil
1 tsp Kosher salt
28 oz tomato sauce
1/2 C heavy cream
2 Tbs dried oregano
2 Tbs dried parsley
2 Tbs dried basil
1/2 C shredded mozzarella
To start off with, roast an entire head of garlic! Cut off the top 1/3rd of the head, drizzle it with a little bit of olive oil, sprinkle with Kosher salt, and wrap that baby up in some aluminum foil. Roast in the oven at 325* for 1 hour. Let cool completely.

Once it has cooled, squeeze out the garlic into a bowl. If it has roasted enough, the garlic will easily squeeze right out. Sprinkle with 1 tsp of Kosher salt, and mash into a paste. Don't worry, the garlic is really soft and will mash right up.

Add in the ricotta cheese and dried parsley, and, you guessed it, mix well!


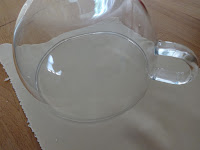
Now then, with your pasta rolled out into a long sheet, find something you can use to cut them into circles. At first, I used an upside down tea cup, but that cut out about a 3.5" circle, which ended up being comically too big! I'll show you that tortellini that I made with that in a second, but I ended up using just a basic biscuit cutter, and that worked out perfectly!

With the teacup, I used about 1 Tbs of filling, dip your finger in some water, and run the dampened finger around half of the cutout round. Fold the circle in half, and you'll have an empenada shaped pasta pocket.

Again, dampen your finger, and dampen one of the resulting corners, then fold this in half, making the two ends meet. This will give you the tortellini shape! The water glues everything together, so as you assemble these, you can just set them aside as you make them.
We'll just say I made the monster sized one so that it would be easier to see what I was doing in pictures...yeah, that sounds good! You can see the size difference between the monster one, and the normal sized one! Hahaha that's hilarious! Once I saw that the biscuit cutter made perfect sized tortellini, I went assembly line style on them. I cut out several circles, put about 1 tsp of filling on each circle, and sealed them up. Once I started doing them like this, I got through all of my dough in about 20 minutes. I fell into an easy rhythm and it went by quickly! My daughter loved watching this, and even tried her hand at making a few!
Okay, so your tortellini are finished, set aside, and waiting for you. You don't have to make this sauce, of course; if you want to use a jarred sauce, I won't tell anyone! However, this sauce takes just a few minutes to pull together, and you know exactly what is in it, and you can change up the ingredients as you want!
Take your minced garlic, and gently saute it until the garlic has softened, about 2 minutes.

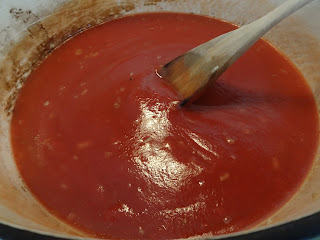
Add in the tomato sauce, dried herbs and heavy cream. Bring to a simmer, then slowly stir in the mozzarella cheese.


Once your cheese has melted into the sauce, add in the fresh tortellini and gently fold them in. Let these cook for about 5-6 minutes in the sauce. Don't go crazy stirring them, but don't be afraid to! These tortellini are sturdy little pasta pockets!

Once they have cooked, serve them up with the sauce, a sprinkle of Parmesan cheese, and I like to have a nice piece of crunchy garlic bread!


No comments:
Post a Comment