
As with most cooking techniques, there are several ways you can go about making chicken stock. For years, I just used a large pot, tossed everything in, and cooked away on the stove top all day. Here's why I'm not crazy about that method: It heats the house up (in the South in the summer time, that's just not going to cut it with me.), and I had to keep adding water to the pot, since the water would evaporate out. The result was good chicken stock, but I wanted GREAT chicken stock.
A couple of years ago, I was gifted an electric pressure cooker, and I haven't looked back. I'm able to toss everything into the pressure cooker, set it for 65 minutes, and within a couple of hours, have an amazing stock. I say a couple of hours, because the timer for the pressure cooker doesn't start until it build the pressure up, and that takes about 30-40 minutes. It saves major time, the hassle of having to add water, and it doesn't heat up the house!
I'll take that every time!

I'll take that every time!
Here's how I make my stock:
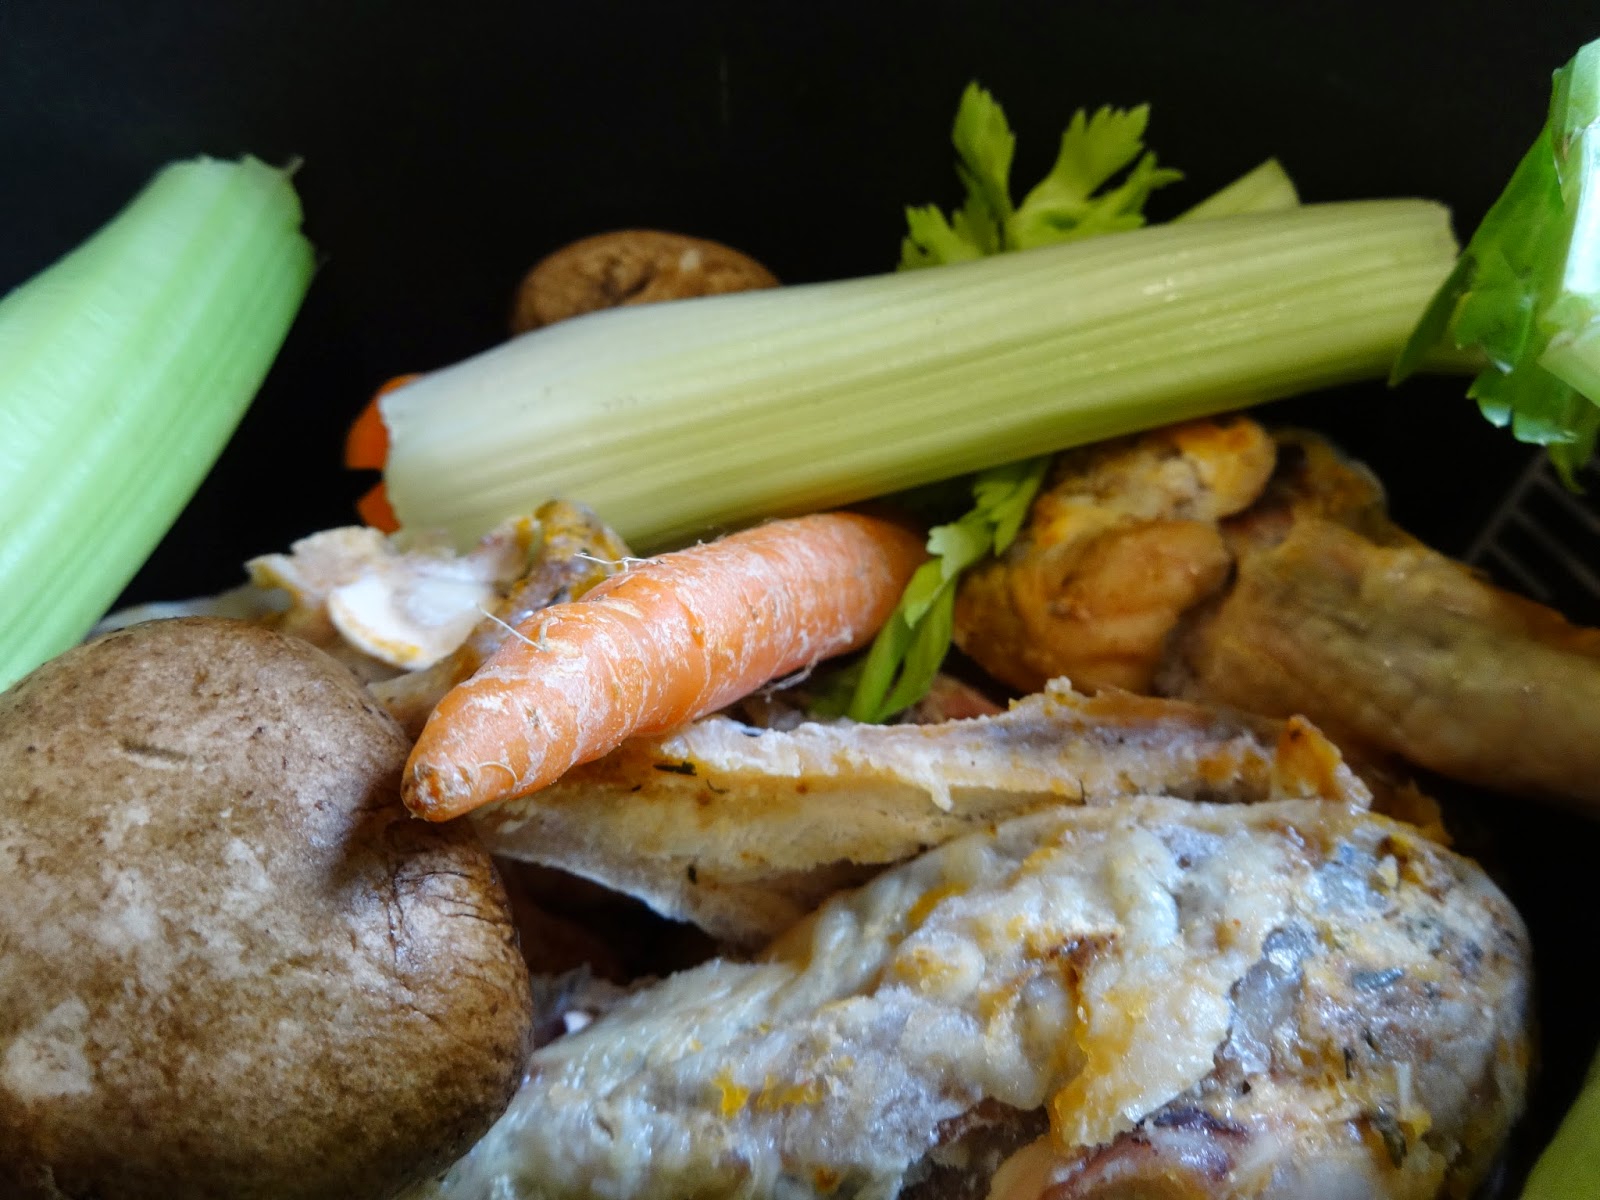
1 leftover chicken carcass
2 carrots
2 stalks of celery
1 C mushrooms (any kind you may have on hand...today, I had some baby Portabella mushrooms I needed to use up)
1 Tbs dried thyme
1 Tbs dried parsley
1 Tbs dried oregano
1 1/2 Tbs garlic powder
2 Tbs Kosher salt*
2-3 bay leaves

Once you have all of the spices together, add these to the chicken carcass, carrots, celery and mushrooms and add water up to the "fill line" on your pressure cooker, or until your pot is filled.


Put the lid on, lock it, set your pressure to "high", set the timer on your cooker to 65 minutes and you're ready to go! If you don't have an electric pressure cooker, do the same sets, except instead of setting your pressure to "high", bring it up to 15 PSI, adjust the heat on your stove to maintain the pressure, and set your kitchen timer to 65 minutes. Once the time is up, you can either let it depressurize naturally, or, if you'd rather, just carefully release the pressure valve built into the pot. I usually use a wooden spoon to flip the release, so I'm not hit with hot steam. That's not good times.
Here is what you will have in just about an hour and a half:


I don't know about you, but I know just want to dive in and go swimming....

 The chicken stocks you buy in a box at the store are this color because of additives and chemicals that have been added. You don't need that stuff, when its this easy and satisfying to make at home.
I normally let mine cool, then put it directly into baggies and into the freezer. But, I wanted to show you what it looks like when you refrigerate it, so this won't alarm you when this happens. This is what a really good chicken stock looks like after it has been refrigerated. It will gel. This is from the collagen that has come out of the bones of the chicken, and this is a really, REALLY good thing. Before I started using my pressure cooker to make chicken stock, I could never get my stock to gel. If you don't have a pressure cooker, and use the pot on the stovetop method, and your stock doesn't gel, that's totally fine. It's still way better than what you get out of a box.

 This stock is so thick, right out of the fridge, that the spoon is sitting on top of it.
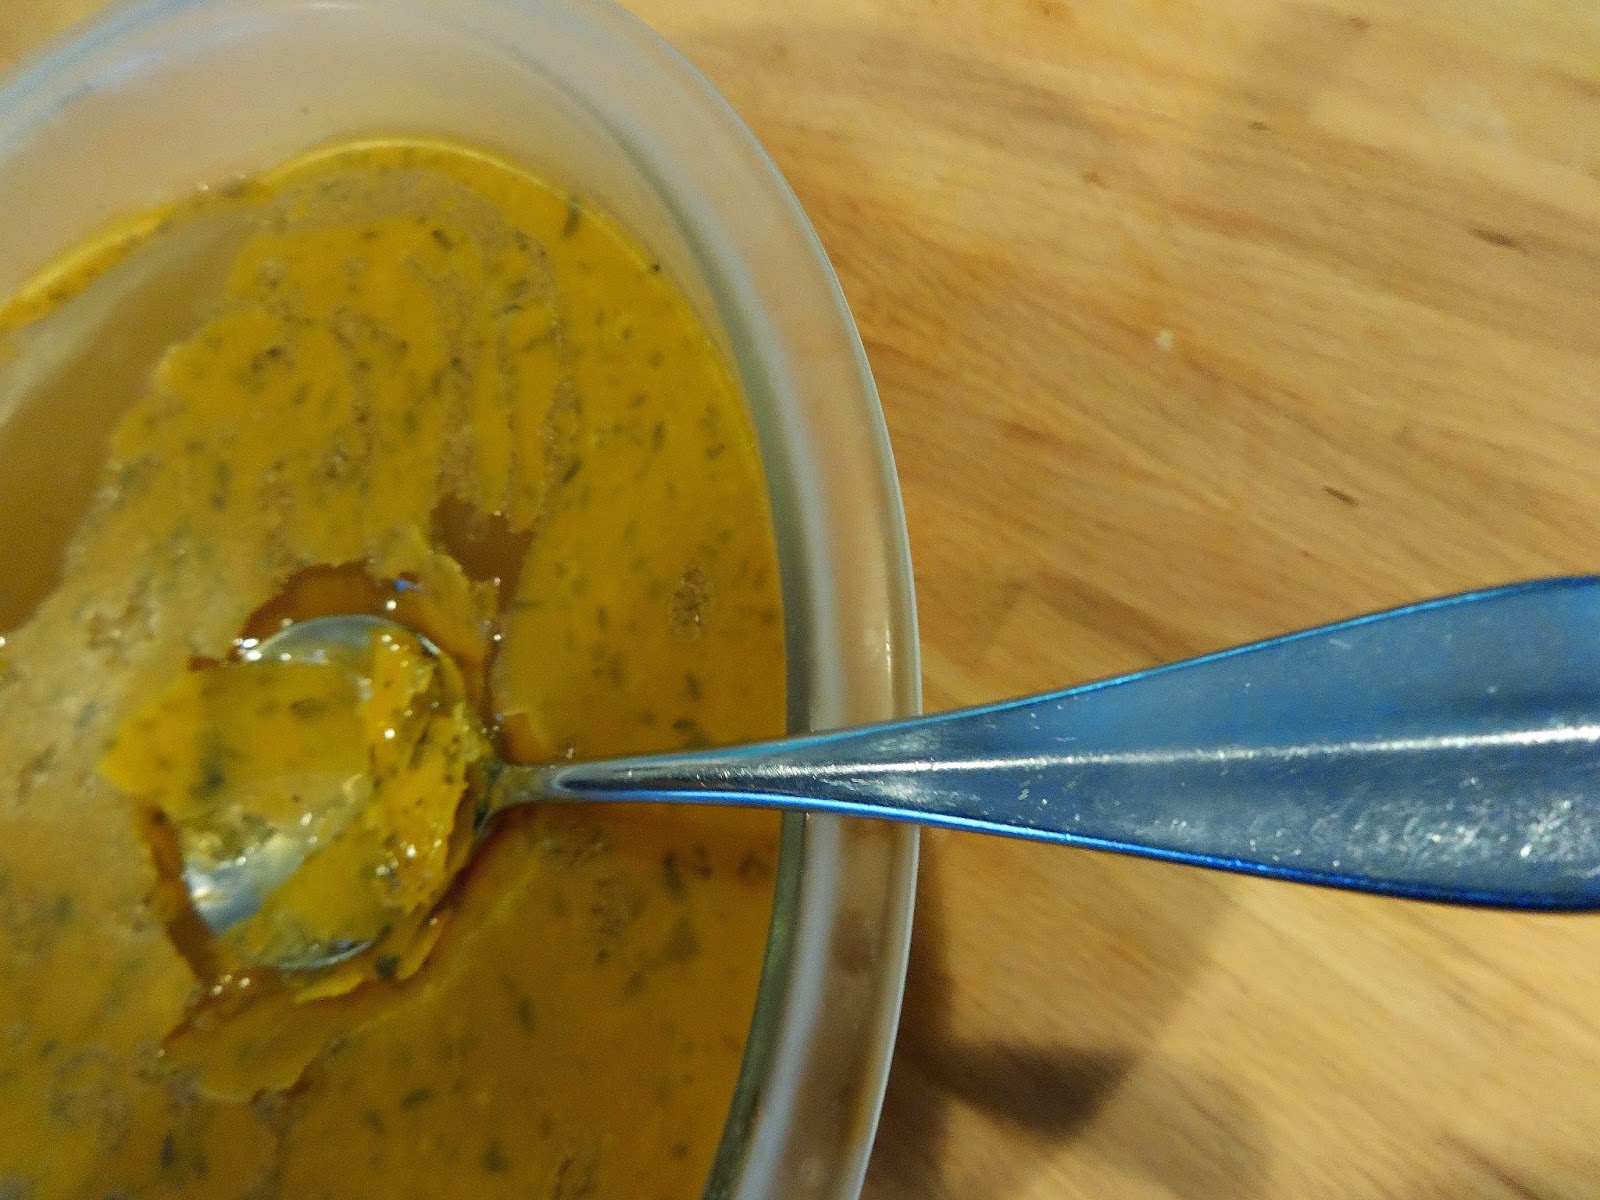

 All gelled up on the spoon and in the pot
Here's a nifty little tip for how I freeze my stocks. I put it in freezer baggies, usually quart sized, but you can put it in whatever sized bag you feel you may need, from an ice cube tray for the smaller amounts needed, on up to a gallon sized baggie, for soups and whatnot. However, when I use baggies to freeze my stock, I put the baggies onto a small baking sheet. I do this, because the baggies will sag around the tines of the freezer shelf, and hug it as it freezes. Which wouldn't be that big of a deal, until you go to grab it out of the freezer later, and cannot get it off of the shelf. I've had that battle more times than I care to admit before I finally figured, if I freeze it on a flat surface, it won't be impossible to get out of the freezer later!


*If you're on a low-sodium diet, or want to know exactly how much salt you're using in a later dish, leave the salt out of the spice mix.
Please let me know if you try this, and how it works for you, or if you have any questions! Come back Thursday, when I'll be making up a super easy, and delicious weekend morning cheese danish! Yum!
No comments:
Post a Comment